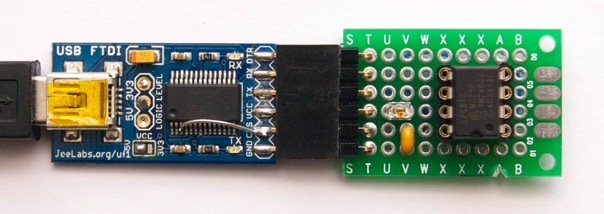
Once the new LPC8xx firmware has been build, it can be programmed into the LPC8xx. The LPC8xx needs to be connected to the computer through a USB-serial adapter. A commonly used adapter is the USB-BUB available at Modern Devices and The Jeelabs Shop. This adapter needs a minor modification with a soldering iron, as described on this Jeelabs blog.
To get things going we need to do the following:
- Installing a program to Flash the LPC8xx.
- Knowing the COM-port.
- Configuring the flash application.
This article is following the article on installing the Eclipse IDE and assumes a firmware image has been build.
1. Installing FlashMagic
A very nice tool to program the LPC8xx is FlashMagic. A free non-commercial use version can be downloaded form the FlashMagic.com website:
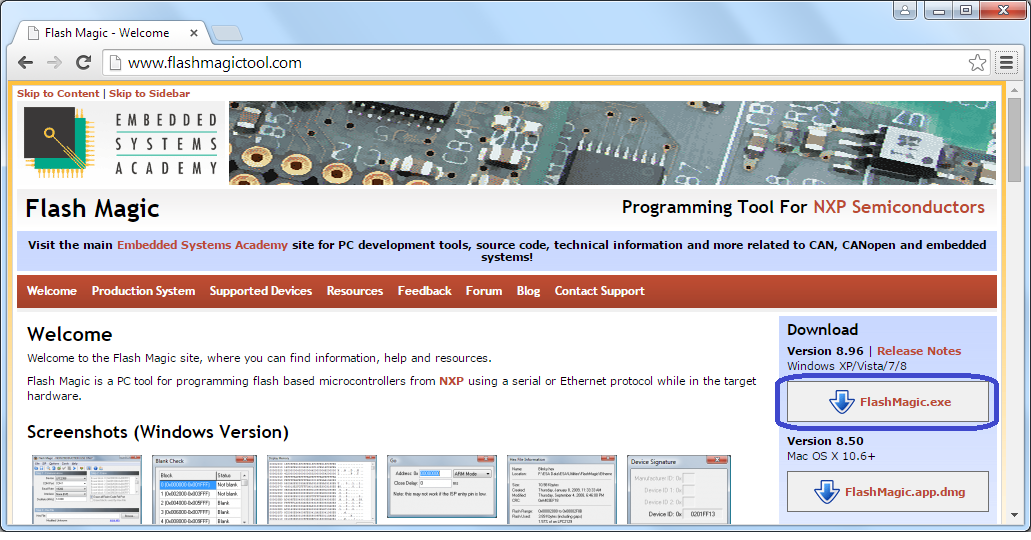
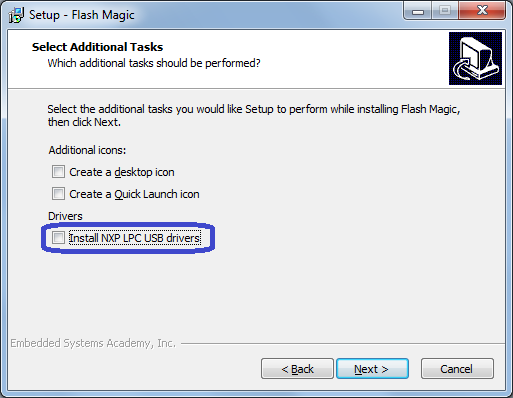
Select the indicated button to download the Windows version. Run the Windows installer (FlashMagic.exe), press Next, accept the license, press Next. Install in the default suggested location (do NOT modify) and press Next and Next again. Now deselect the “Install NXP LPC USB drivers“:
Press Next and press Install. After the files are installed, press Finish. Close Notepad with the release notes once done. FlashMagic is now installed and can be found in the Start menu.
2. Finding the COM-port
When using the usb-serial device on a Windows computer it is always a surprise which COM port it gets assigned. Luckily, nowadays it is always the same COM number for a specific device.
Connect the USB-serial device
Open the device manager. For example through Windows-key+Pause, -> Device Manager (in the upper right corner of the dialogue). Expand “Ports (COM & LPT)“:
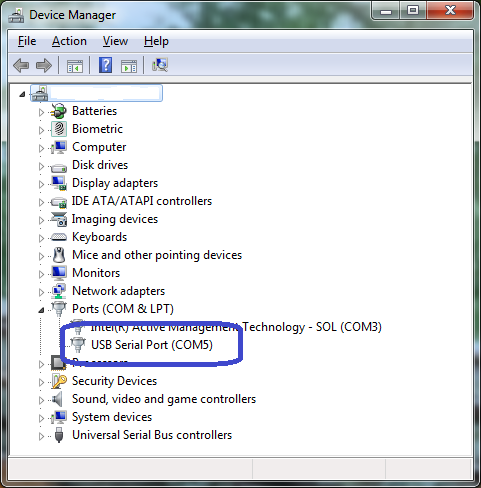
Here you will find the USB-serial adapter, when it is connected. When you have multiple connected, disconnect the one you are looking for, and after a few seconds reconnect. Observe which one disappears and reappears. In this case, the adapter is connected to COM5 as indicated in blue.
3. Configuring FlashMagic for the LPC810
Start FlashMagic form the Start-menu:
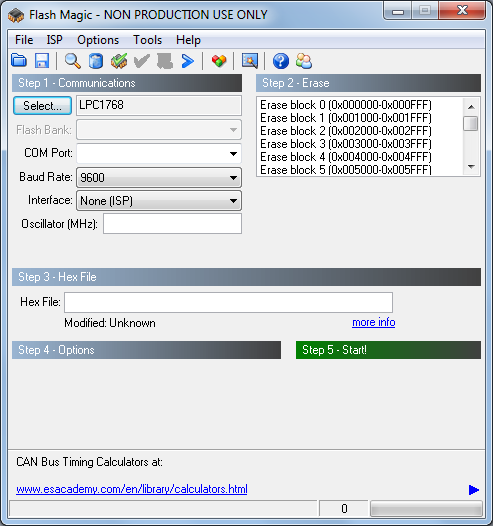
Press the Select button in the upper right corner. Here we have to find the proper type of LPC that we want to program. In the list, scroll upwards (Make sure “ARM Cortex” is expanded):
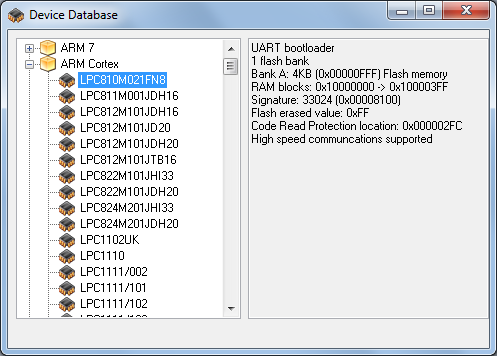
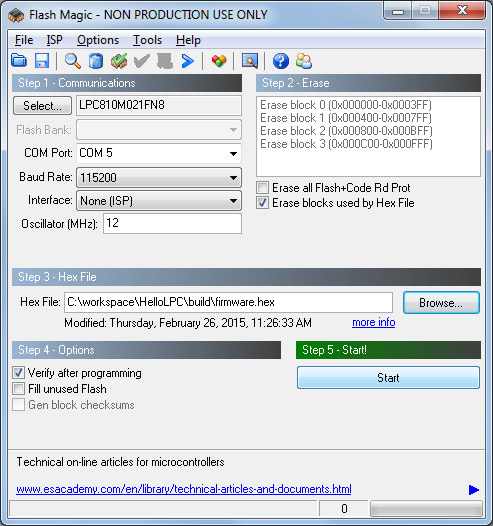
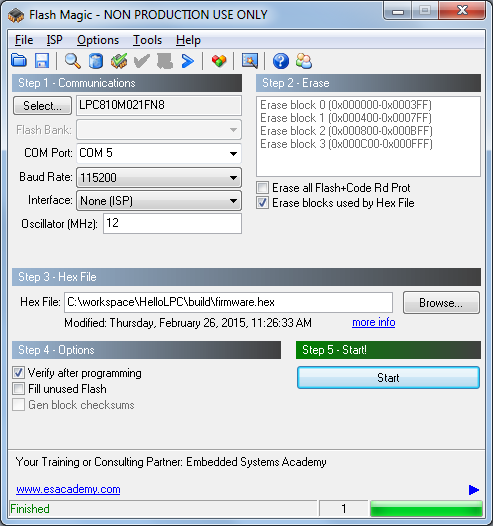
Now select “LPC810M021FN8” by double-clicking the entry. This is a type indication for the LPC8xx we are using in its exact package. For other LPC8xx projects the selection is less obvious as you have to know the package (number of pins, form factor). But for the LPC810 there is only the 8 pin DIP package. Further settings:
COM Port: COM5 (fill in your specific COM-port)
Baud Rate: 115200
Oscillator (MHz): 12
Check “erase blocks used by Hex File”
Check “Verify after programming”
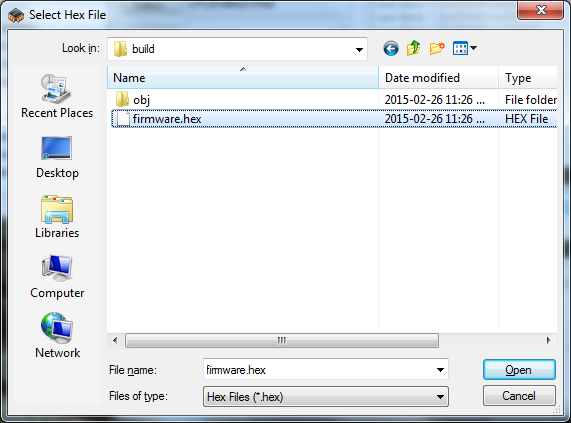
Press Browse to select the firmware.hex file that we want to flash.
in the dialogue that opens select the folder C:\workspace\HelloLPC\build and in there select firmware.hex :
Press Open and now the FlashMagic panel should look like this:
Make sure your LPC810 is connected to the USB-serial device (see for example this blog) and press Start to flash the LPC810. After a few moments, the new program is stored in the LPC810 and has started executing. FlashMagic will report success on the bottom line by saying Finished:
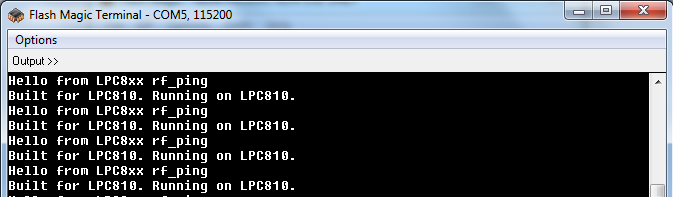
When to program produces serial output, In FlashMagic a terminal can be opened on the main menu Tool -> Terminal… Set “COM Port” to the usb-serial COM-port, and “Baud Rate” to 115200. Press OK and a terminal windows opens. It is not the best or fastest, but helps for a quick check
This and the previous article has shown how to build and flash Jeelabs Embello programs on Windows PC with a true IDE. Further articles will be dedicated to debug options and more automation.
One thought to “Picos ARM – Flashing the firmware image (Windows)”