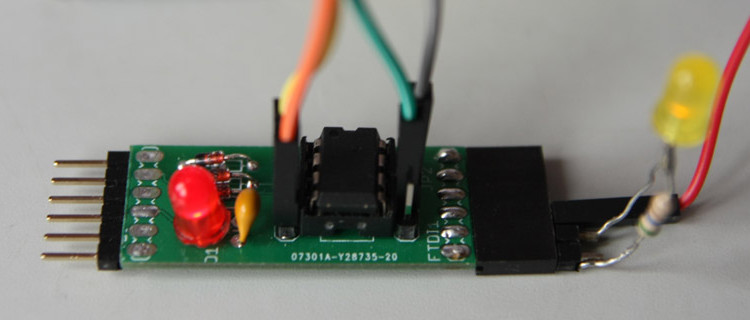
Nucleo STLINK for LPC8xx – behind the scenes

This post is summary of the challenges it I was faced with. I write it down hoping that I may save others some time. Maybe a reader can enlightne me on any misconceptions form my side.

Getting a Nucleo F103RB STM32 to work as a STLINK adapter for an LPC810 is really simple. It has been described by Rick in cortex-m0+ SWD debugging on the cheap. I had it working in an hour. Only four issues:

1. I tried to get it working with OpenOCD 0.9.0, which has some modified syntax for flashing the LPC.
2. I did not get the nRESET connection to work properly. Luckily, SWD can perform a reset by writing a register in the LPC.
3. Some images flashed correctly. Others failed with an error code 9 in OpenOCD.
4. The most annoying: Ricks approach works, but all interrupts did not get through. So no blinking LEDS in the basic examples.

So after the first success I started ironing out the few remaining issues. Oh boy!

Read More

Picos ARM – LPC8xx fun with Jeelabs on Windows

Picos ARM is a series of articles on this blog bringing the new LPC810 Jeelabs.org RFM69 activites described in the JeeBook to the Windows PC. For those who appreciate working with a comfortable full-blown IDE in stead of the Raspberry Pi command lines to build and debug stuff.

The series cover by now:

  1. Setting up an Eclipse IDE for LPC8xx projects in windows
  2. Flashing the firmware to the LPC8xx
  3. Setup of On-Chip Debugging in Eclipse IDE
  4. Connecting the Nucleo STLINK-V2-1 SWD debugger interface to the LPC810

Some Eclipse CDT Plug-ins have been developed to make setup and use of Eclipse IDE easier for the LPC8xx JeeBook type of projects. More will follow soon on easier setup of debugging facilities.

Eclipse CDT Plug-ins – New C/C++ Project Templates

A C/C++ New Project Template in Eclipse CDT can be seen as a set of template files that form the new project source code and other resources, and a description how to copy the files and setup the project. The latter is in the template.xml file. The template files can be source code (.c, .c++, .gcc, .g++), include files (.h, h++), libraries, makefiles, icons, etc. It can be actually any file in complete folder structures.

Macro’s

One of the interesting properties is that the new project files can contain macros that get replaced upon copying. This can be used to add a copyright notice, a file name or a specifc refrence to a header named as the project.

//============================================================================
// Name : $(projName).cpp
// Author : $(author)
// Copyright : $(copyright)
// Description : Send RFM69 packets. Report received data on the serial port
//============================================================================ 

#include "$(projName).h"
int main () {

When the template is selected in the New C/C++ Project Wizard, the templateEngine expands the macro’s:

//============================================================================
// Name : rf_ping.cpp
// Author : sevenwatt
// Copyright : (c) 2015 All rights reserved.
// Description : Send RFM69 packets. Report received data on the serial port
//============================================================================

#include "rf_ping.h"
int main () {

This is actually a cool feature.

For makefiles the same mechanism exist. But as in makefiles the same syntax $(MACRO) is already extensively used, for the templates a new syntax is introduced: {{macro}}. There is one  restriction: the source template file has to be named MakeFile, just like the target.

LINK = {{LPCType}}.ld
OBJS = {{baseName}}.o system_LPC8xx.o gcc_startup_lpc8xx.o uart.o

Macro’s can originate from:

  • Eclipse C/C++ build variables (user defined and built-in)
  • Eclipse C/C++ environment variables
  • Properties on the New C/C++ project wizard pages
  • Template-defined properties in the wizard pages

Adding wizard pages

The template language has propertyGroups and properties. PropertyGroups represent a newly added wizard page, while the properties represent the UI input fields and the underlying variable the property is stored in:

<property-group id="advanced" label="%LPC8xxHello.advanced.label"
  description="%LPC8xxHello.advanced.description" type="PAGES-ONLY" help="help.html">
     <property id="toolchain" label="%LPC8xxHello.toolchain.label"
       description="%LPC8xxHello.toolchain.description" type="browsedir"
       mandatory="false" default="%LPC8xxHello.toolchain.default" persist="false" />
</property-group>

The property has an id="toolchain". This property id can be used as macro $(toolchain) in the process steps in the template for example as a include file location.

The following UI widgets are available as property UI, by assigning the value to attribute type:

  • input: If you want a text input box.
  • multiline: If you want a multi-line input box.
  • select: If you want a drop-down combo box.
  • boolean: If you want an option button.
  • stringlist: If you want a list box.
  • speciallist: If you want a list box with buttons to add and delete items to it.
  • browse: If you want a browse button which opens a file (not directory) selection dialog
  • browsedir: If you want a browse button which opens a directory selection dialog

Performing actions in templates: Processes

In templates, processes can be defined. Processes take actions such as creating a project and copying files to those projects. Examples of predefined processes are:

  • org.eclipse.cdt.core.CreateResourceIdentifier
  • org.eclipse.cdt.core.ExcludeResources
  • org.eclipse.cdt.core.Copy
  • org.eclipse.cdt.core.AddLink
  • org.eclipse.cdt.core.AppendCreate
  • org.eclipse.cdt.core.Append
  • org.eclipse.cdt.core.AddFiles
  • org.eclipse.cdt.core.AddFile
  • org.eclipse.cdt.core.CreateIncludeFolder
  • org.eclipse.cdt.core.CreateSourcefolder
  • org.eclipse.cdt.managedbuilder.core.NewManagedProject
  • org.eclipse.cdt.managedbuilder.core.GenerateMakeFileWithBuildDescription
  • org.eclipse.cdt.managedbuilder.core.SetMBSStringOptionValue
  • org.eclipse.cdt.managedbuilder.core.SetMBSStringListOptionValues
  • org.eclipse.cdt.managedbuilder.core.SetMBSBooleanOptionValue
  • org.eclipse.cdt.managedbuilder.core.AppendToMBSStringOptionValue
  • org.eclipse.cdt.managedbuilder.core.AppendToMBSStringListOptionValues
  • org.eclipse.cdt.ui.OpenFiles
  • org.eclipse.cdt.managedbuilder.gnu.ui.SimpleGNUMakefileGenerator

A simple example of process specification is:

<process type="org.eclipse.cdt.managedbuilder.gnu.ui.SimpleGNUMakefileGenerator">
    <simple name="projectName" value="$(projectName)"/>
<code></process></code>

Prevent macro replacement

Sometimes it is unwanted to have the macro’s expanded. For example you want to expand the $(projName) in main.cpp, but do not want to expand an included make file rules.mk, because it is in the make language and includes several make macro’s. There is a solution for this in the template language. A parameter of several process, like AddFiles and Copy is replaceable. The primary semantics of replaceable = "true" is:

Expand the macro’s

However the eclipse CDT documentation gives it the semantics:

Use this flag to specify whether the file should be replaced or not, if it is found in the target location

This is mostly incorrect. AddFile and AddFiles only process the macro’s. the Copy process also processes the macros’s conditionally, but has a quirk. When replaceable = "false" it fails to create target folder structure when needed. If the target folder exists, it just copies the files. The actual syntax in the process step is: <simple name="replaceable" value="true" />.

Available macro’s and syntaxes

There are some predefined macro’s in the CDT system:

projName, baseName, ........

Also some special eclipse syntax can be used:

${workspace_loc:<resource path>} for example ${workspace_loc:$(projName)/lib}

Those built-in variables and special syntax is used in the specification of a Process step:

<process type="org.eclipse.cdt.core.AddFiles">
   <simple name="projectName" value="$(projectName)" />
   <complex-array name="files">
       <element>
            <simple name="source" value="rf69.cpp" />
            <simple name="target" value="{$(workspace_loc:$(projectName)/lib}/rf69.cpp" />
            <simple name="replaceable" value="true" />
       </element>
   </complex-array>
 </process>
 

When dealing with Windows, paths may contain spaces. To indicated a path string with  spaces, double quotes can be used in the template.xml file. The problem with double quotes is that it belongs to XML syntax. The following will work in the template.xml file:

<element value="&quot;$(toolchain)/&quot;" />

Setting project properties

Project properties can be set by pressing Alt-Enter in the project navigator. What can be set through the UI can also be set by the template. An example of setting additional include search paths is:

<process
  type="org.eclipse.cdt.managedbuilder.core.AppendToMBSStringListOptionValues">
      <simple name="projectName" value="$(projectName)" />
      <complex-array name="resourcePaths">
          <element>
              <simple name="id"
                value="org.eclipse.cdt.build.core.settings.holder.incpaths" />
              <simple-array name="values">
                  <element value="&quot;$(toolchain)/&quot;" />
              </simple-array>
              <simple name="path" value="" />
          </element>
      </complex-array>
</process>

The property that is set in this example is: org.eclipse.cdt.build.core.settings.holder.incpaths.  The difficult part is to figure out what the internal name of the property is that needs to be set. One way to figure out is to set a property in the property of project pages and give it a value that can be easily searched on, such as COME_FIND_ME. Then search with your favorite tool within files in the active workspace folder. I normally do this in windows with Notepad++. Most settings are by the way stored in the .cproject file, but sometimes it is stored in preferences of core components or plug-ins. This stackoverflow.com question (second answer) gives some strategies to find the built-in properties.

List of “known” properties

Paths and symbols – includes org.eclipse.cdt.build.core.settings.holder.incpaths
Paths and symbols – symbols org.eclipse.cdt.build.core.settings.holder.symbols
Settings – Tool settings – Optimization gnu.c.compiler.option.optimization.flags
 gnu.c.link.option.libs
 gnu.c.link.option.nostdlibs
gnu.cpp.link.option.libs

Selecting the project type for the template

The plugin.xml file defines which templates are provided by a plugin or core module. It also specifies the C/C++ project type category. This can be

EXE org.eclipse.cdt.build.core.buildArtefactType.exe
Shared Lib org.eclipse.cdt.build.core.buildArtefactType.sharedLib
Static Lib org.eclipse.cdt.build.core.buildArtefactType.staticLib
Makefile org.eclipse.cdt.build.makefile.projectType

By setting the projectType attribute in the template element, the proper category the template shows is selected: projectType="org.eclipse.cdt.build.makefile.projectType". A full specification of a plugin delivering one template would look like this in plugin.xml:

<plugin>
  <extension point="org.eclipse.cdt.core.templates">
      <template
        filterPattern=".*g\+\+"
        id="com.sevenwatt.templates.LPC8xxHelloWorld"
        location="templates/projecttemplates/LPC8xxHelloWorld/template.xml"
        projectType="org.eclipse.cdt.build.makefile.projectType">
      </template>
  </extension>
</plugin
Eclipse CDT Plug-ins – Tutorials and useful links

A collection of useful links to tutorials and other sources of information on developing Eclipse Plug-ins is given here. Particularly on CDT plug-ins little information is available. For the better part, luckily, this is very close to generic Eclipse Plug-ins, with the exception of C/C++ “New Project Templates”.

1. Generic Eclipse Plug-in tutorials

Good series of blog-posts from 2009/2010 is written by cvalcarcel. It is recommended to follow parts 2-5 until you get the basic idea on Plug-ins, and extending the UI:
Writing an Eclipse Plug-in (Part 2): Creating a custom project in Eclipse – Adding to the New Project Wizard
An index to the 24 parts of this series is missing so I provide it here in the last section of this post.
Problems getting step 2 done? Maybe some useful hints here.

Many tutorials are written by Lars Vogel at  www.vogella.com/tutorials/eclipse.html. When it comes to installing/distributing/ deploying the newly developed plug-in, this tutorial is very helpful:
Extending the Eclipse IDE – Plug-in development – Tutorial
To get an understanding on extending menu’s see this:
Eclipse Commands Advanced – Tutorial

Some other Eclipse plug-in tutorials:

http://www.euclideanspace.com/software/development/eclipse/plugin/wizard/index.htm
http://meri-stuff.blogspot.nl/2012/04/writing-eclipse-plugins-tutorial-part-1.html
also available at http://www.javacodegeeks.com/2012/05/writing-eclipse-plugins-tutorial-part-1.html

2. Eclipse CDT Plug-in tutorials

Specifically on C/C++ CDT extension there are not many tutorials around. CDT can be extended just as it works with other Eclipse plug-ins. Using the public API’s of CDT. Next to that CDT can be extended with “New C/C++ Project…” templates.

Template development:

The Eclipse CDT Help documentation gives a good description on how to write and add a template, although this is not direct beginners level. It requires the ability to read API documentation:
How to add project templates to CDT
Look at examples: Picos ARM, Eclipse CDT built-in

Read this post explaining several aspects of template development.

3. Eclipse CDT Tips and Tricks

Finding properties to be set from a template, see second answer:
http://stackoverflow.com/questions/6711056/eclipse-cdt-new-project-template-how-to-add-a-library

Finding types of property page controls for templates:
How to develop templates – documentation on property
testWidgets

Setting Environment
How to save project-wide environment variables programmatically
Forum post eclipse forum

4. Extending the UI

Some unsorted links
http://www.java2s.com/Code/Java/SWT-JFace-Eclipse/FileDialogExample.htm
http://www.java2s.com/Code/Java/SWT-JFace-Eclipse/DemonstratestheDirectoryDialogclass.htm
http://www.vogella.com/tutorials/EclipseWizards/article.html
http://www.eclipse.org/articles/article.php?file=Article-JFaceWizards/index.html
http://www.eclipse.org/swt/examples.php
http://www.eclipse.org/articles/article.php?file=Article-Understanding-Layouts/index.html

5. Miscellaneous / advanced topics

http://www.ibm.com/developerworks/opensource/library/os-ecfeat/
http://codeandme.blogspot.de/2012/10/integrating-custom-builder.html
http://www.eclipse.org/articles/Article-Builders/builders.html
Eclipse CDT source code

 6. Links to Writing Eclipse Plug-in series

Part 1: What I’m going to do
Part 2: Creating a custom project in Eclipse – Adding to the New Project Wizard
Part 3: Create a custom project in Eclipse – New Project Wizard: Time to Refactor
Part 4: Create a Custom Project in Eclipse – New Project Wizard: the Behavior
Part 5: Adding Icons and A New Project Structure
Part 6: Adding an Icon To New Project Types
Part 7: Creating a Custom Navigator
Part 8: Common Navigator: Adding a New Sorter Under navigatorContent
Part 9: Custom Project: Defining a Custom File Type
Part 10: Custom Project: Creating a Custom File Type
Part 11: Common Navigator: Displaying Custom Resources, Refresh or Die, The Magic of navigatorContent
Part 12: Common Navigator: Keeping the Tree Open When a New Resource is Added
Part 13: Common Navigator: Adding Tests
Part 14: Common Navigator: Refactoring the Children
Part 15: Custom Project: Customizing the Perspective Menus (Main menu)
Part 16: Custom Project: Customizing the Perspective Menus (Toolbar)
Part 17: Custom Project: Customizing the Perspective Menus Using Customize Perspective
Part 18 : Common Navigator: Adding submenus (Presentation/Behavior)
Part 19: A Quick Display Fix
Part 20: Return of the Popup Menu (For an Empty Navigator)
Part 21: Return of the Popup Menu (Displaying Resources)
Part 22: Common Navigator: Adding submenus (Presentation)
Part 23: Common Navigator: Rewriting History
Part 24: Common Navigator: Configuring the submenus (Presentation…again)
Writing an Eclipse Plug-in: The Missing Zip Files

Eclipse CDT plug-ins – What could possibly go wrong?

Hints on getting started with CDT plug-ins

1. Introduction

On a good day I decided that it would be very convenient if I could add some “New project” templates to eclipse. The basics are documented fairly well in the eclipse documentation. It even provides an example. With the aid of some basic tutorials on eclipse plug-in development I was able to come a long way. Not far enough. I failed to get the example working. After some more google-ing and finding my way, I learned that a good approach is to take a look at the source code of other templates. especially of those that are provided standard in Eclipse CDT. This finally gave me my first added template. By the time I did this, I also installed a lot of GNU ARM Eclipse Project templates. With the effect that my own template was difficult to find in a long list. So I came to the unfortunate insight that I could develop a “New Project Wizard” that only showed my own templates. So I did!. Finally I thought it is a hassle to setup a new workspace every time I create a new one. Could this be automated a bit. Of course. So I set out writing a plug-in that was able to discover some tools within Windows and set their paths in variables within Eclipse. The good news is: I did it and it works. The bad news: I lost a week of my life. I write this in the hope that others undertaking the same or similar enterprise can learn and only loose a couple of days of their lives. I am not the only one struggling with this. I fully under scribe the quote of this guy justinmreina on stackoverflow.com “It is AMAZING how hard this stuff is to find” when discussing adding specific build or compiler settings with templates.

2. Follow tutorials

There are some really good tutorials on Eclipse plug-in development written. Notably a series of 24 posts by cvalcarcel and the famous Vogella.de tutorials. In another post (link to be added) I provide a list of links to those.  The thing is: This requires very careful reading. But only after gaining experience one starts to understand the significance of certain casual remarks. I followed the cvalcarcel tutorial up to step 5. I am not interested in the other UI aspects in the later posts. Yet I believe there is an error in step 2, which is luckily refactored in step 3 so issue solved. Something with a replaced string without the definition of the string.

What the tutorial did not tell

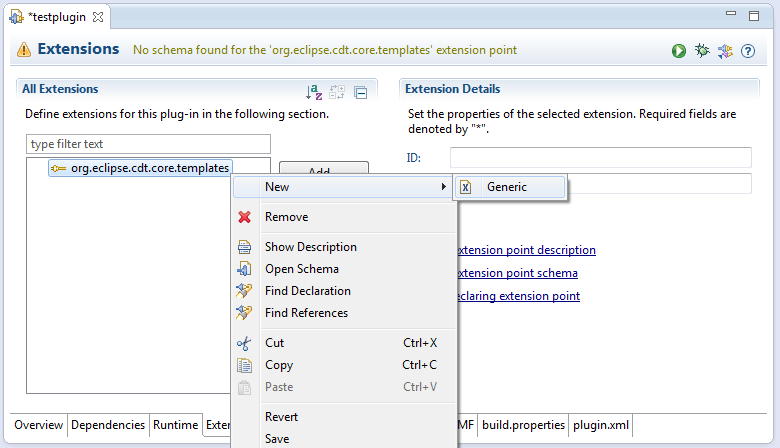
No schema found

When adding an extension to an extension point, a common task is to add attributes to this extension. It can happen that the attribute you are looking for is not in the list. The top-bar of the manifest editor tells “No schema found”: SchemaNotFound This means that eclipse was looking for the sources of the extension point and did not find them. Make sure that:

  • Eclipse SDK
  • C/C++ Development Tools SDK

Are installed. Both can be installed from main menu Help -> Install new software. For the first the eclipse update site needs to be selected to find it, and for the second the regular Juno/Luna releases site, under “Programming Languages”.

Add dependencies first

When trying to extend an extension point on the extensions tab, but the extension does not show up in the search list, you probably first have to add the parent package at the Dependencies tab.

3. New Project Templates for CDT

As said, I did not get the example to work, despite good instructions from help.eclipse.org. My advice, find yourself a set of example templates (as jar files) and import them in a workspace for reference. Source code of the CDT provided templates can be found in CDT repository in org.eclipse.cdt.managedbuilder.gnu.ui

Find org.eclipse.cdt.managedbuilder.gnu.ui*.jar, or get source code from git.eclipse.org Check out templates/projecttemplates/* and plugin.xml.

GNU ARM Eclipse has a lot of templates, but it is surrounded by a complete infrastructure and java extensions. So it is more difficult to use for teaching purposes.

Some simple inspiration can be taken from my Picos ARM templates for LPC8xx projects in github.

Setting project properties from the template

The template can set include folders, include or library paths and a lot more project properties. What can be set at the project properties page in the UI can also be set from a template. The only questionis how do you know what it is called. The bes tanswer is: Reverse engineering. Look into source code. Try to see what gets changed in eclipse and workspace internal files when you enter something unique in the UI. At stackoverflow.com, in the second answer to a question, justinmreina gives a brief very helpful tutorial reverse engineering.

Adding a template for makefiles

In the Eclipse Template Extnesion point it is nicely documented that there are three predefined values for projectType:

projectType – This attribute is a project type id referring to the cdt project type that the template will be associated with. Project types are contributed to the org.eclipse.cdt.managedbuilder.core.buildDefinitions extension-point. This attribute is mandatory. CDT pre-defines the following values of the build artifact type property:

  • “org.eclipse.cdt.build.core.buildArtefactType.exe” – to represent executable
  • “org.eclipse.cdt.build.core.buildArtefactType.staticLib” – to represent static library
  • “org.eclipse.cdt.build.core.buildArtefactType.sharedLib” – to represent shared library

But what about the fourth standard category: Makefile projects? The projectType can also be set to: projectType=”org.eclipse.cdt.build.makefile.projectType”

Type of widgets for template user defined wizard pages

I was not able to figure out whether it is possible to show a input field conditionally, for example first field is a boolean checkmark, and if unchecked, hide/disable the next input string field. I also could not figure out whether I could evaluate variables within the template based on input in the wizard. What I did find was a list of possible Widgets to use in the template through an eclipse test class: http://git.eclipse.org/c/cdt/org.eclipse.cdt.git/tree/core/org.eclipse.cdt.ui.tests/resources/projectTemplates/testWidgets/template.xml

4. Other CDT  Plug-ins

Environment variables

One might come to the insight that it would be need to set a variable or environment variable in the workspace by a plug-in extension. After a lot of tracing/stepping through the Preferences page code, and searching the internet I have to conclude: All public interfaces can only read environment variables. there is no public API to set environment variables. This is confirmed by some forum posts: http://stackoverflow.com/questions/6186754/eclipse-cdt-how-to-save-project-wide-environment-variables-programmatically-pe https://www.eclipse.org/forums/index.php/t/812519/